In this article, I will guide you through configuring Gmail to send and receive emails in Odoo.
You need co complete 2 steps:
Step 1: Create a Gmail Account to Send Emails
Register a free Gmail account: https://mail.google.com/
To use the account for sending emails, follow these steps:
Enable IMAP Forwarding on Gmail
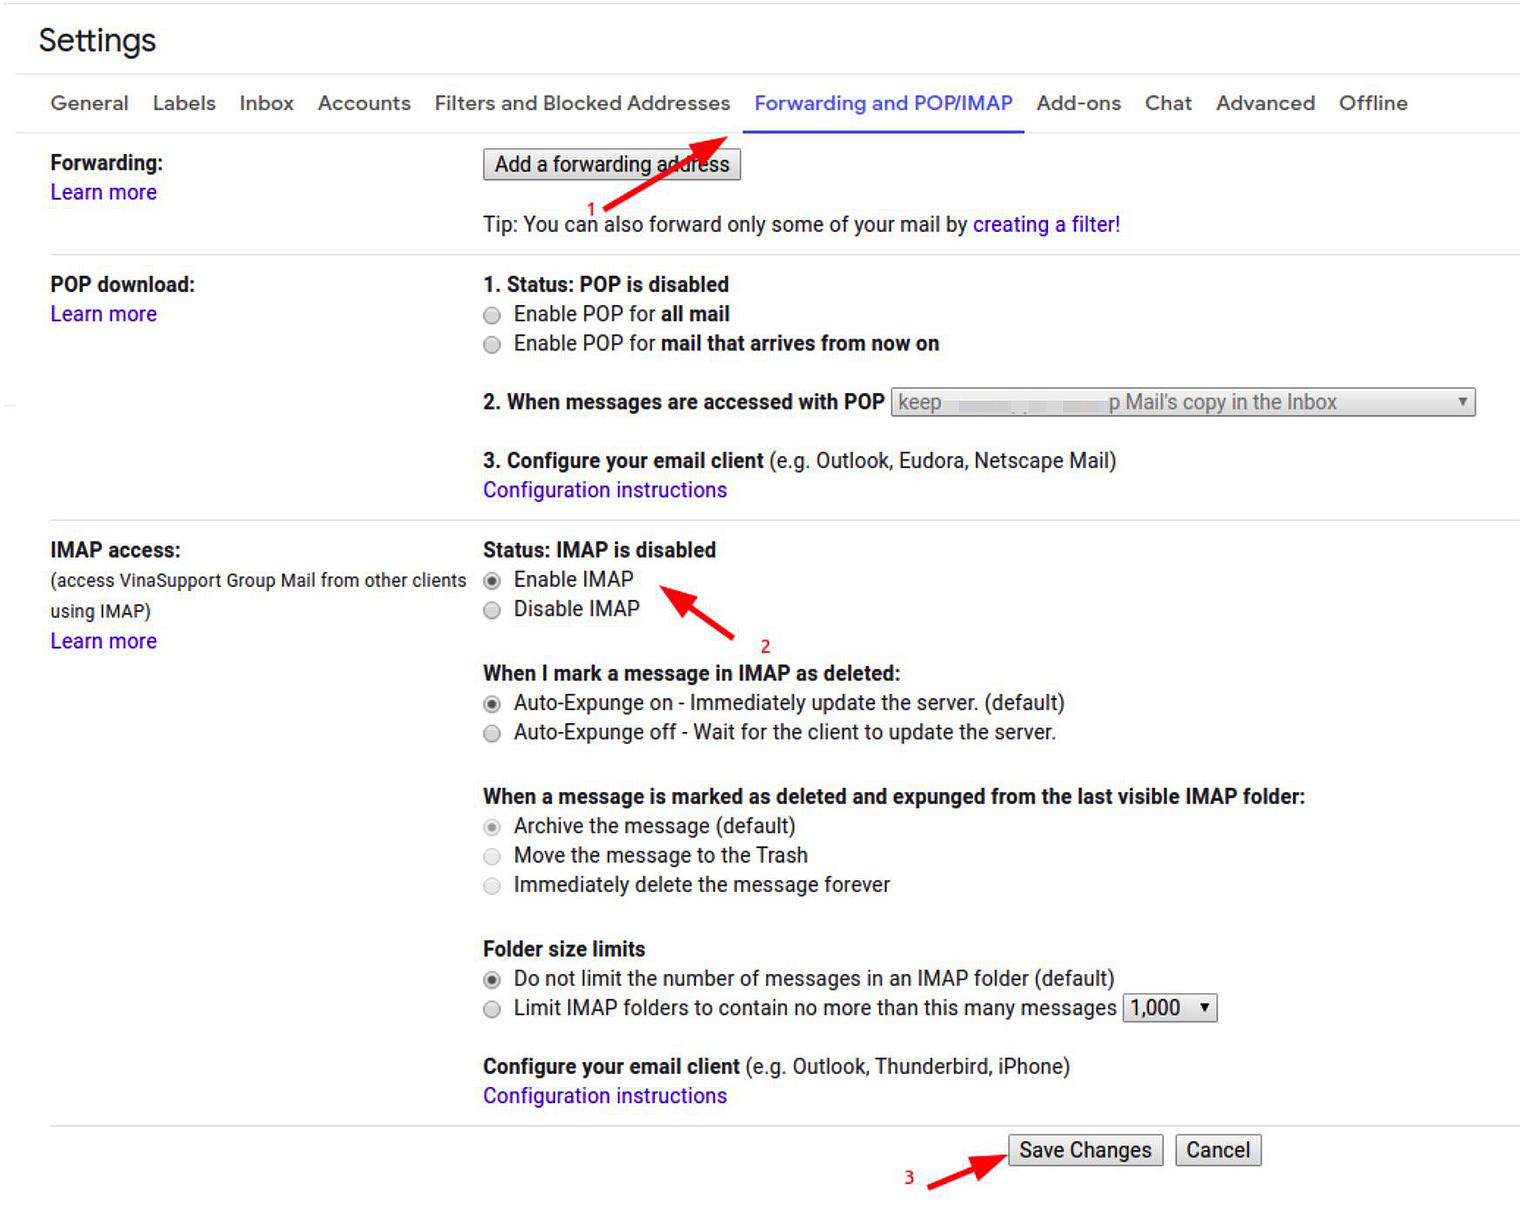
From Gmail, go to the settings management (Settings).
Select the [Forwarding and POP/IMAP] tab => In the IMAP access section, choose "Enable IMAP" => Click [Save changes] to save the settings.
Enable 2-Step Verification in Gmail and Use an App Password
Our goal is to create an app password for use because Google currently does not accept direct login with passwords from applications, so it's necessary to create an app password.
To do this, you need to complete two steps:
- Step 1: Enable 2-step verification.
- Step 2: Create an app password.
Note: If you do not complete Step 1, you cannot proceed to Step 2..
Detailed instructions can be found in Google's guide link below:
https://support.google.com/accounts/answer/185833?hl=vi
After obtaining the app password, proceed to Odoo.
Step 2: Configure the Email Server to Send and Receive Emails in Odoo
Configure the Incoming Mail Server
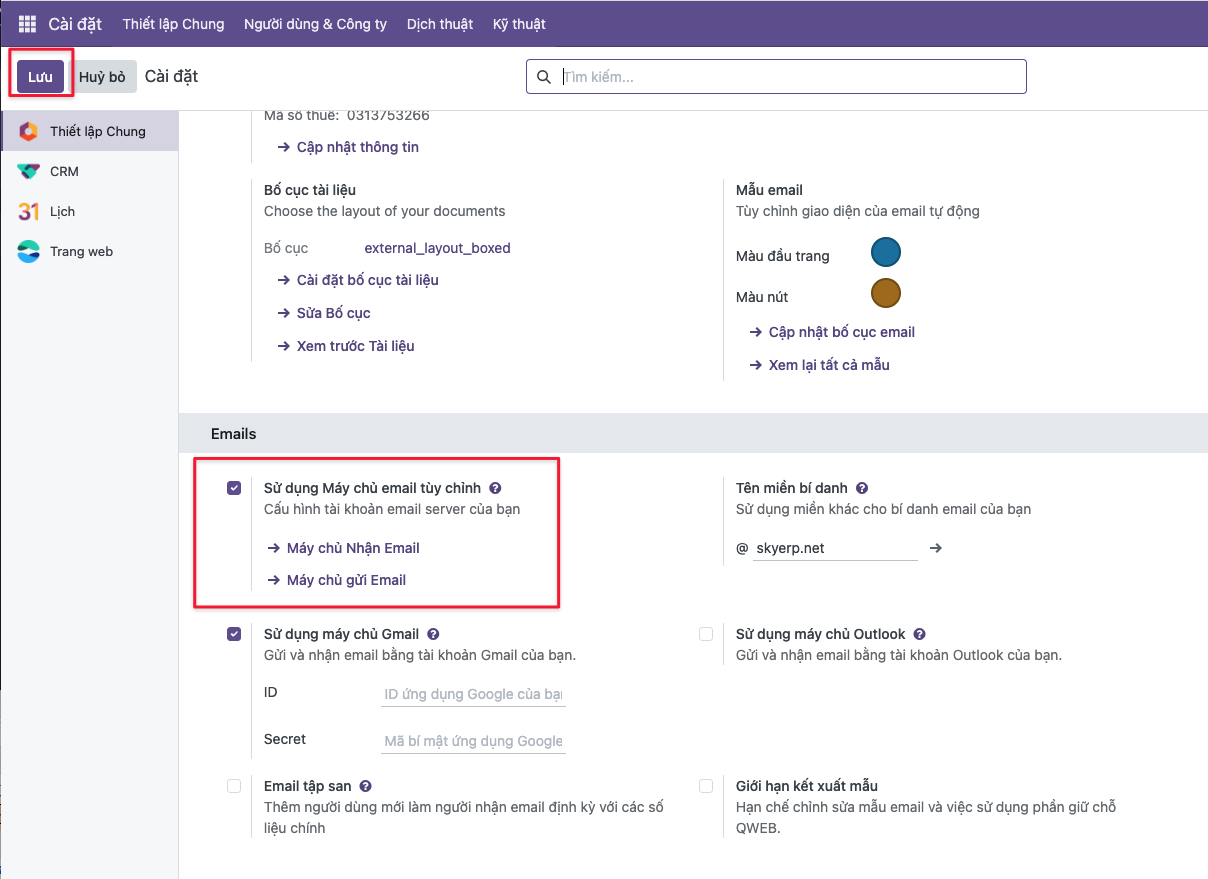
Go to Settings.
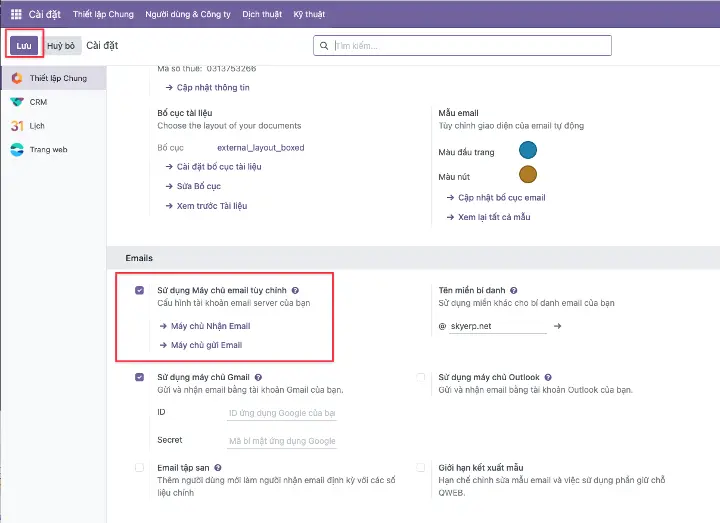
On the settings screen, do the following:
- Check External Email server
- Click Save
- Click Incoming Mail Servers.
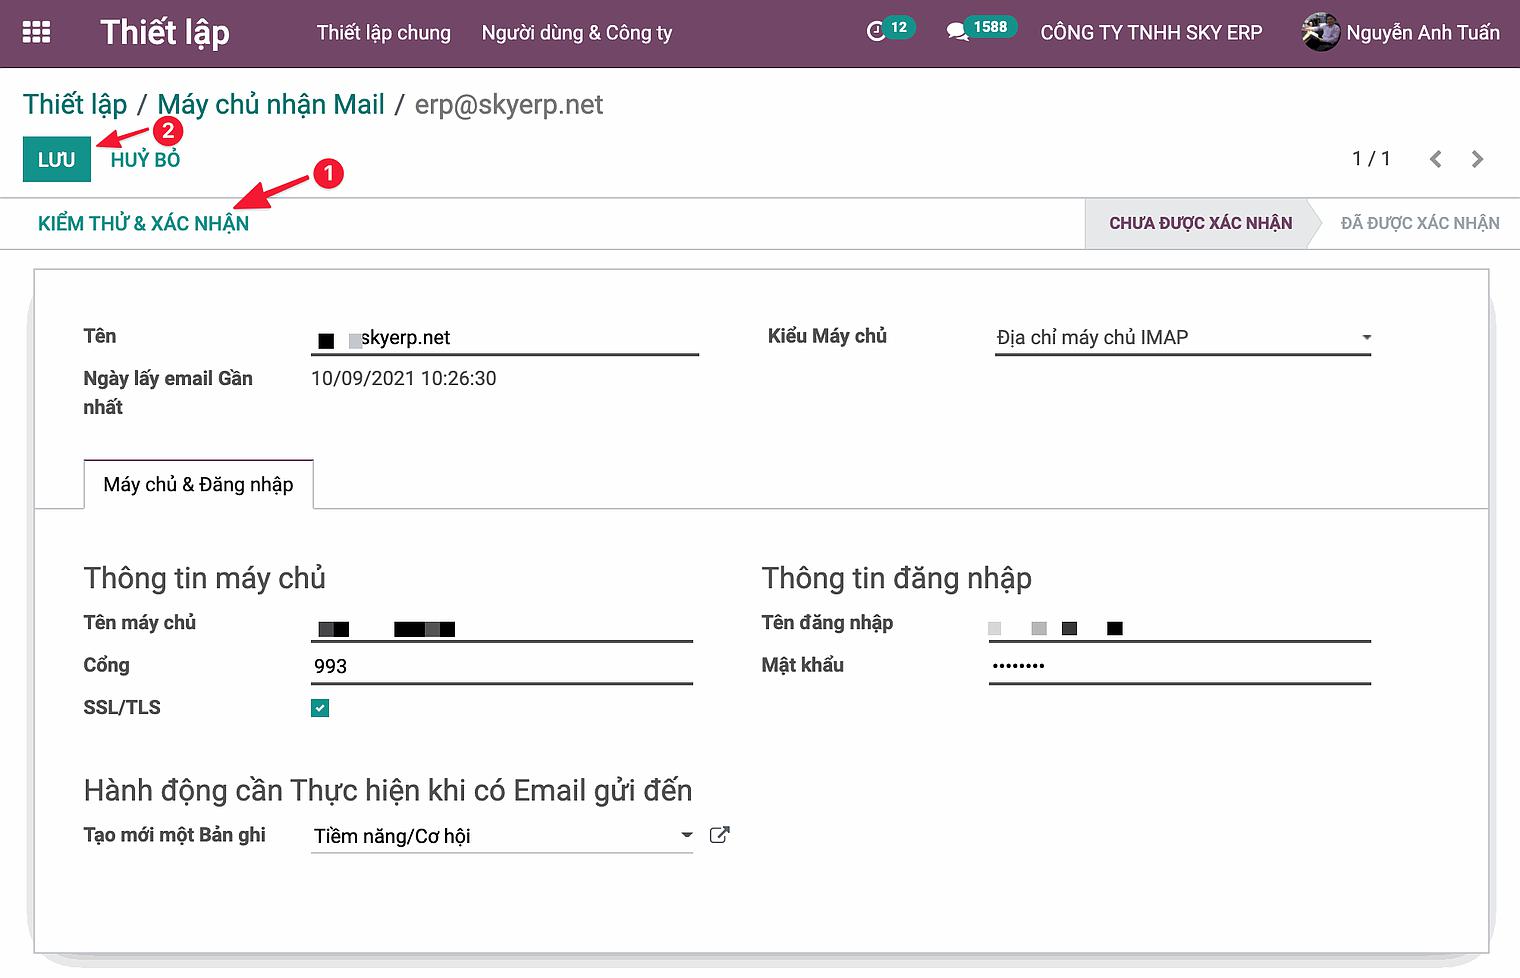
Click Create to add a new email server.
For Gmail accounts, note the following:
- Server Name: imap.gmail.com
- For the password, use the app password mentioned earlier.
Other information can be filled in as shown in the image.
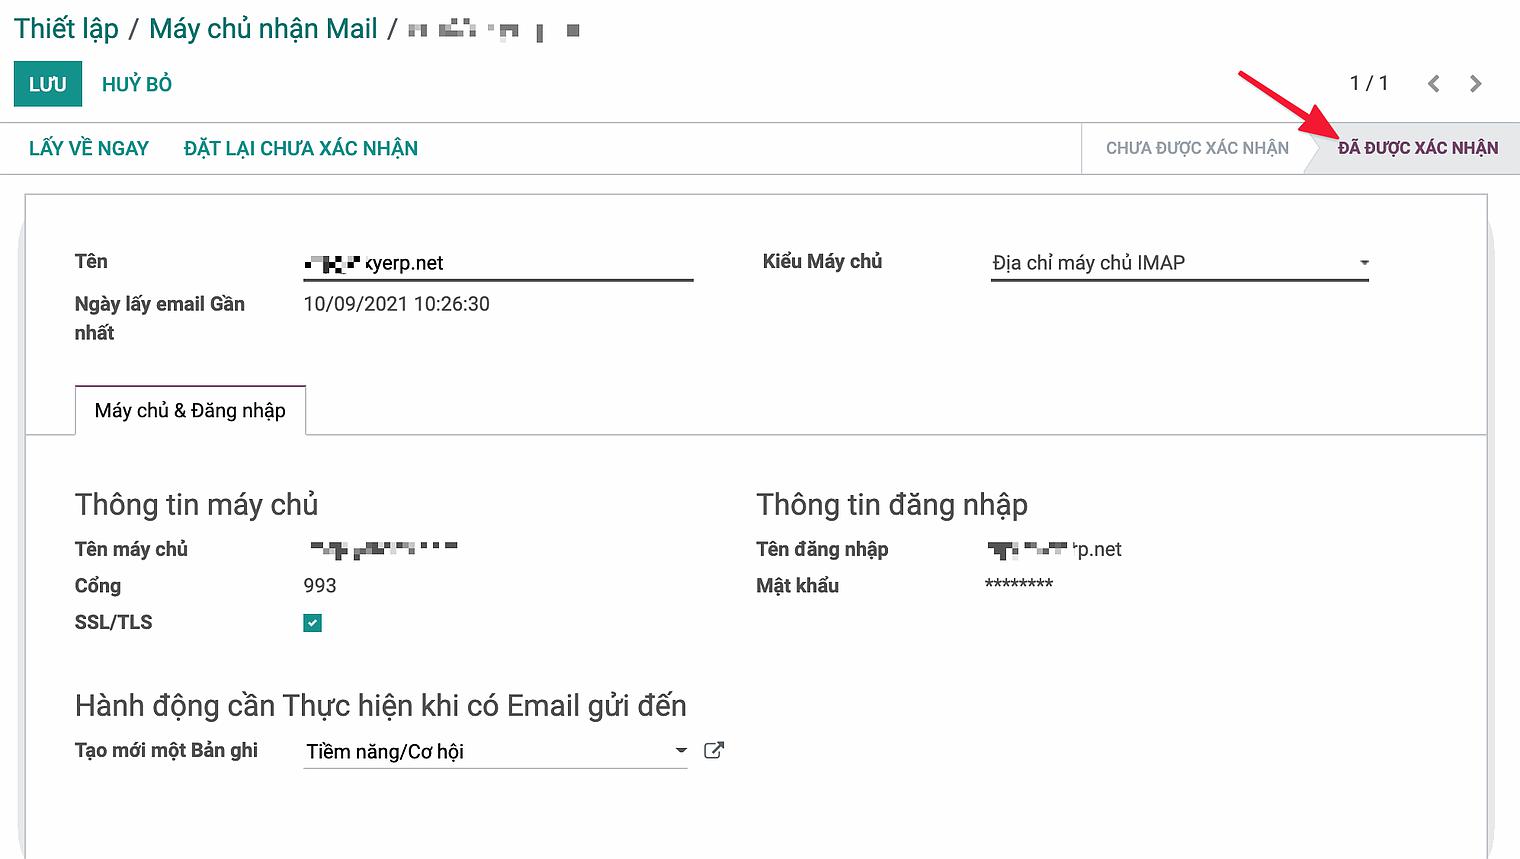
Click Test & Confirm; if successful, the status will change to "Confirmed."
Configure the Outgoing Mail Server
Similarly, go to the settings screen.
On the settings screen, do the following:
- Check External Email server
- Click Save.
- Click Outgoing Mail Servers.
Create a new one and fill in the information as follows:
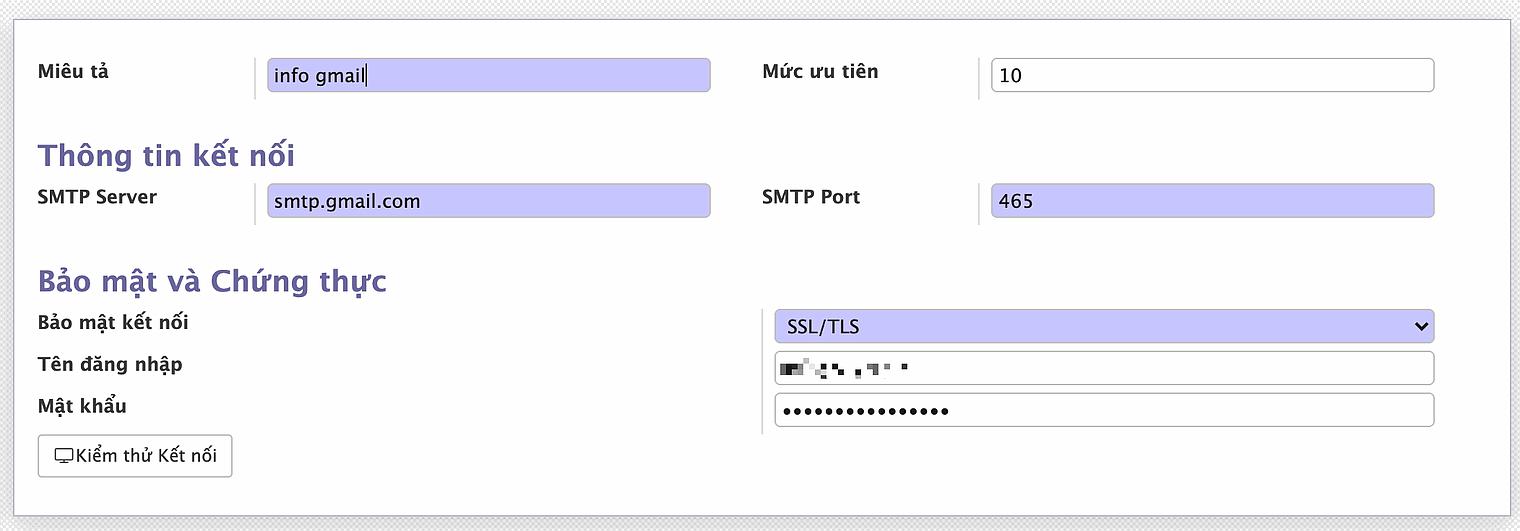
Input your gmail credential
- Description: Short description
- SMTP Server: smtp.gmail.com
- SMTP Port: 465
- Connection Security: SSL/TLS
- Username: your_full_email (ex: yourname@gmail.com)
- Password: Your Gmail App password (do not use your gmail password)
Click [Test Connection] to check the connection.
If you see a notification like the one below, the connection is successful. Note that the "Odoo Server Error" message is just the title of the popup in Odoo; in reality, we have successfully configured email sending in Odoo.
Click [OK] to close the notification and [Save] to save the configuration.
You can create multiple SMTP Servers. Emails will be sent in the order of "Priority" as set up.
Good luck configuring Gmail to send and receive emails in Odoo.
Read next: Reference: Centralized Email from Odoo ERP System: A New Step in Business Communication

How to Configuring Gmail to Send and Receive Emails in Odoo